7 Steps to Effectively Sterilize Garden Tools
The smell of blackened tomato stems lingers in memory long after the plants have been composted. When bacterial wilt or fungal blight sweeps through a garden bed, pathogens cling to pruners, spades, and trowel edges with remarkable tenacity. Understanding the steps to sterilize garden tools after disease prevents the invisible transfer of verticillium, phytophthora, and fire blight spores to healthy specimens. A single contaminated blade can inoculate an entire season's crop. The protocol demands systematic attention to every cutting surface, handle junction, and soil-contact point.
Materials
Effective sterilization requires both mechanical and chemical agents. Gather the following supplies before beginning the process:
Cleaning Agents (pH 2-3 acidic solutions preferred)
- Household bleach (5.25% sodium hypochlorite)
- 70% isopropyl alcohol or ethanol
- 10% trisodium phosphate solution
- White vinegar (5% acetic acid) for light maintenance
Abrasive Tools
- Wire brushes (brass or stainless steel)
- Steel wool pads (grade 0 or 00)
- Nylon scrub pads for softer metal surfaces
Protective Equipment
- Nitrile gloves rated for chemical resistance
- Safety glasses
- Bucket or basin (minimum 2-gallon capacity)
Optional Enhancers
- Penetrating oil (for post-sterilization rust prevention)
- Diatomaceous earth (mild abrasive for organic protocols)

While sterilization does not involve NPK ratios directly, maintaining clean tools preserves the cation exchange capacity of soil by preventing pathogen-induced nutrient lockout. Diseased plants often exhibit disrupted auxin distribution, and contaminated tools spread the causal agents.
Timing
Sterilize tools immediately after working with diseased plant material. In USDA Hardiness Zones 3-5, late-season sterilization before the first hard freeze (typically late September through October) prevents overwintering of pathogens on tool surfaces. Zones 6-8 require vigilance during wet spring months (March-May) when fungal spore loads peak. Zones 9-11 face year-round disease pressure and demand weekly sterilization protocols during active growing seasons.
Conduct deep sterilization:
- After each use on confirmed diseased plants
- Before moving between garden zones or beds
- At seasonal transitions (spring startup and fall cleanup)
- Following work in commercial nurseries or shared garden spaces
Phases
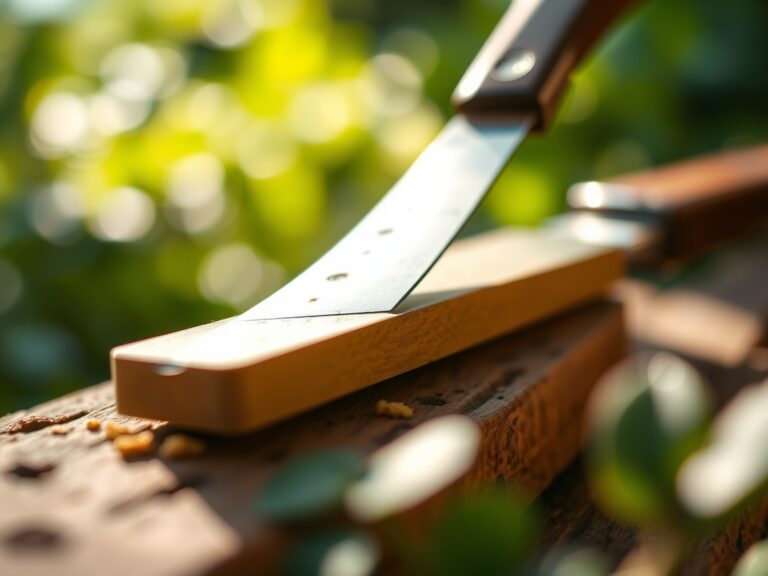
Step 1: Initial Soil Removal
Scrape all visible soil, sap, and plant debris from blades and tines using a putty knife or wire brush. Organic matter shields pathogens from sterilizing agents. Remove rust deposits with steel wool, exposing bare metal for maximum contact with disinfectants.
Pro-Tip: Work over a tarp or dedicated waste container. Dispose of scraped material in sealed plastic bags, not in compost bins where pathogens remain viable for 18-24 months.

Step 2: Hot Water Pre-Wash
Submerge tools in water heated to 160-180°F for 30 minutes. This thermal shock denatures protein coats on bacterial cells and softens remaining organic deposits. Add 2 tablespoons of dish detergent per gallon to enhance surfactant action.
Pro-Tip: Use a camping stove or outdoor burner. Indoor water heaters rarely maintain sufficient temperature under load.
Step 3: Chemical Disinfection
Prepare a 10% bleach solution (1 part bleach to 9 parts water). Immerse tools completely for 30 minutes. Bleach oxidizes cell membranes of fungi, bacteria, and viruses. Alternative: 70% alcohol wipes for 60-second contact on small pruners between cuts.
For fire blight or bacterial canker, use 1:4 trisodium phosphate solution. This alkaline treatment (pH 12) disrupts pathogen cell walls more effectively than bleach for certain gram-negative bacteria.
Step 4: Rinsing and Neutralization
Rinse tools thoroughly in clean water to remove all bleach residue. Residual sodium hypochlorite accelerates metal corrosion and damages plant tissue during subsequent use. A vinegar rinse (1:10 dilution) neutralizes alkaline cleaners and provides mild additional antimicrobial action.
Pro-Tip: Use distilled water for final rinse in hard-water areas. Mineral deposits create micro-pits where pathogens colonize.
Step 5: Drying Protocol
Air-dry tools completely in direct sunlight. UV radiation provides supplementary sterilization, with UV-C wavelengths (200-280 nm) disrupting microbial DNA. Forced-air drying with a leaf blower prevents flash rust on carbon steel blades.
Step 6: Lubrication and Storage
Apply a thin coat of mineral oil or silicone-based lubricant to metal surfaces. This barrier prevents oxidation and denies moisture to any remaining spore structures. Store tools in a low-humidity environment (below 50% relative humidity) with adequate air circulation.
Pro-Tip: Add a packet of silica gel desiccant to enclosed tool boxes. Replace every 60 days during humid seasons.
Step 7: Documentation
Maintain a sterilization log noting date, method, and specific pathogens encountered. This record tracks disease patterns and validates protocols for certified organic operations requiring documented IPM practices.
Troubleshooting
Symptom: Persistent rust spots after sterilization
Solution: Increase steel wool abrasion before chemical treatment. Apply phosphoric acid-based rust converter, then re-sterilize.
Symptom: Disease reappearance despite sterilization
Solution: Check tool handles and rivets where organic matter accumulates. Disassemble multi-part tools quarterly for complete cleaning.
Symptom: Metal pitting or blade degradation
Solution: Reduce bleach exposure to 10 minutes maximum. Switch to alcohol-based protocols for high-carbon steel tools.
Symptom: White residue on tools post-treatment
Solution: Hard water mineral deposits. Use distilled water or add 1 tablespoon citric acid per gallon to rinse water.
Symptom: Tools remain sticky after oil application
Solution: Excess lubricant attracts soil particles. Wipe to a thin film. Bake tools at 200°F for 15 minutes to polymerize oil coating.
Maintenance
Between sterilization cycles, wipe cutting surfaces with 70% alcohol after each use. Sharpen blades at 23-degree angles using a whetstone lubricated with honing oil every 40 hours of active use. Store pruners with springs released to prevent metal fatigue. Inspect wooden handles monthly for cracks that harbor pathogens. Sand and re-oil handles with linseed oil twice annually.
Apply 0.5 ounces of food-grade mineral oil per square foot of metal surface area. Replace brush heads on power washers every season to prevent cross-contamination.
FAQ
How long do pathogens survive on tools?
Fungal spores remain viable 6-18 months on dry surfaces. Bacteria survive 3-6 months. Viruses degrade within weeks but require immediate sterilization.
Can I use household disinfectants instead of bleach?
Quaternary ammonium compounds work for bacteria but fail against many fungal spores. Pine oil disinfectants lack sufficient concentration for reliable sterilization.
Do I need to sterilize after every cut?
When working with known infected plants, sterilize between each cut. For general maintenance, sterilize between different plant species or at bed transitions.
Will freezing temperatures kill pathogens on tools?
No. Many pathogens enter dormancy below 32°F and resume activity during spring thaw. Chemical sterilization remains necessary.
How do I sterilize power equipment?
Disassemble guards and clean debris. Spray all surfaces with 10% bleach solution. Allow 30-minute contact time before rinsing. Drain fuel and run engine dry before treatment.